Automating tax receipts saves your team time and ensures your donors receive exactly what they need. This guide will walk you through how to easily set up automated tax receipts in your Trellis account.
Overview of Tax Receipt Setup
There are three steps to enabling tax receipts on a fundraiser:
-
Complete all required information in your Organization Profile
-
Create a Tax Receipt Template
-
Enable Tax Receipts on each specific fundraiser
Step 1: Complete Your Organization Profile
-
From your Dashboard > Profile, make sure the following fields are fully filled out:
-
Organization Name
-
Legal Organization Name
-
Organization Number
-
Minimum Tax Receiptable Amount
-
Short Organization Description
-
Organization Address
-
Organization Email
-
Organization Phone Number
-
Organization Website
-

Important:
All of the above is required in order to generate official tax receipts. Missing information will cause tax receipts to fail.
Step 2: Create a Tax Receipt Template
-
From the Dashboard menu, go to Tax Receipting > Tax Receipt Templates
-
Click Add New Template in the top-right corner
-
Fill out the following fields:
-
- Tax Receipt Template Name: A descriptive name for the template. The template name is not donor-facing, it's for internal use only.
- Tax Receipt Prefix: A prefix for receipt numbering (e.g., "TR", "[Fundraiser]", or “2024”). This is donor-facing and will appear on the PDF file name.
- Tax Receipt Body Text: Customizable text acknowledging the donation and meeting compliance standards. This appears above the required tax receipt details. Our system has a default message that is generated, that orgs can edit.
- Signer Information: Name, Job Title, and Digital Signature
-
Click Publish to save and activate your template

Additional Features:
- Test the Template: Send a test tax receipt to your account email to verify its appearance and content.
- Duplicate Templates: Create variations for different events
-
Archive Templates: Retains the template for history but removes it from fundraisers
-
Unarchiving moves it to draft status—it will not auto-connect to past fundraisers
-
-
Delete Templates: Permanently removes the template and disconnects it from all events
-
Only recommended for unused duplicates or test versions
-

Step 3: Enable Tax Receipts on a Fundraiser
Once your template is ready, link it to your fundraiser:
- In the Fundraiser Builder, go to Admin > Tax Receipts
- Toggle on Enable Tax Receipts and select your template
- Toggle on Include Fees Paid by Donors to issue tax receipts for donor-covered fees.
- If enabled, the fees covered by donors will be included in the tax receipted amount. If the only amount eligible on the purchase are the covered fees, then the covered fees must meet the minimum amount set under organization profile. Example: If a $5.50 fee is the only receiptable portion and your threshold is $25, the donor won’t receive a receipt
- If enabled, the fees covered by donors will be included in the tax receipted amount. If the only amount eligible on the purchase are the covered fees, then the covered fees must meet the minimum amount set under organization profile. Example: If a $5.50 fee is the only receiptable portion and your threshold is $25, the donor won’t receive a receipt
- Enable Send Tax Receipts Automatically at Purchase for receipts to be generated and sent automatically after each checkout. If you'd like to manually review purchases and issue receipts after your fundraiser, you can toggle off tax receipts.

Additional Details
- If you delete a tax receipt template while it's connected to a fundraiser, receipts will fail to generate.
- Canadian raffle tickets are not tax receiptable, but donation upsells for raffles are. Follow the above steps and the platform will automatically send tax receipts only to the donation part of donors. Just make sure your fundraiser name doesn't have the words "raffle", "lotto" or "50/50" in it so you don't run into CRA concerns. (Main Menu > Page Design > Fundraiser Name)
- To send tax receipts for silent and live auctions, please view this article.
- Tax receipting for third-party fundraisers is handled differently. Please contact support@trellis.org for guidance.
- In Canada, the minimum tax receiptable amount is 20%. This Canada Revenue Agency (CRA) article contains additional information.
- If you would like to learn more about the Canada Revenue Agency (CRA) guidelines for issuing tax receipts, please visit this link.
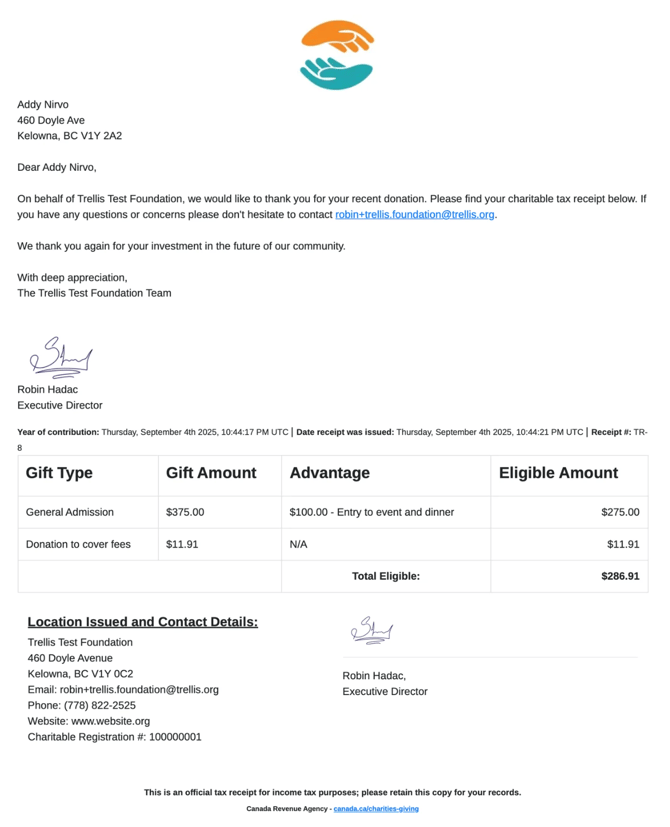
Example Canadian Tax Receipt
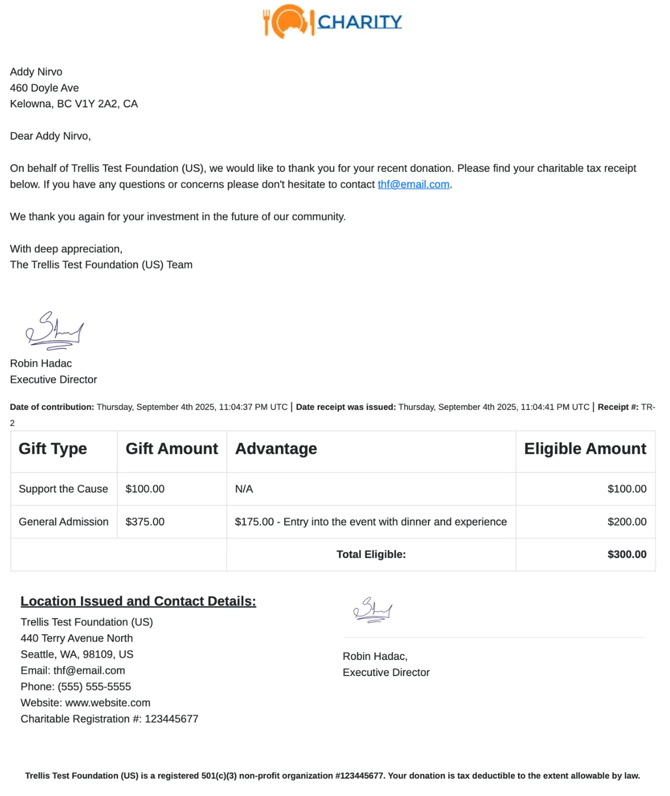
Example US Tax Receipt
Related Articles
What are Tax Receiptable Amounts?
How to Include Donor-Covered Fees in Your Tax Receipts
How to Update an Regenerate Tax Receipts
Need Help?
Did this answer your question? If not, please reach out to our Product Engagement Team via the blue chat icon or email support@trellis.org.